Ford Escort
27/12/2025
Despite having an adoration for aviation, my childhood attempts at making Airfix models were terrible. Windows were cloudy and decals were torn. Parts were poorly fit, partially painted and covered in thumbprints from where the plastic melted under my gluey fingers.
However, my DIY projects have taught me much about foresight and patience. Mistakes come from rushing, clumsiness or skipping dry times. Generally, you can't go wrong for as long as you have tomorrow. Most mistakes can be reversed if you're prepared to extend your stay in a construction site for one more day.
So I wondered: can I transfer these lessons to scale model making and redeem my miserable past?
I caught the end of this year's WRC season and loved it, so a rally car was the obvious choice. I also hoped it might aid my other attempts to make home decor that wasn't a framed picture. I bought the 1:24 scale Ford Escort RS 1800 Mk.II Lombard RAC Rally model from Italeri, with similar-ish colours to those stated in the manual.

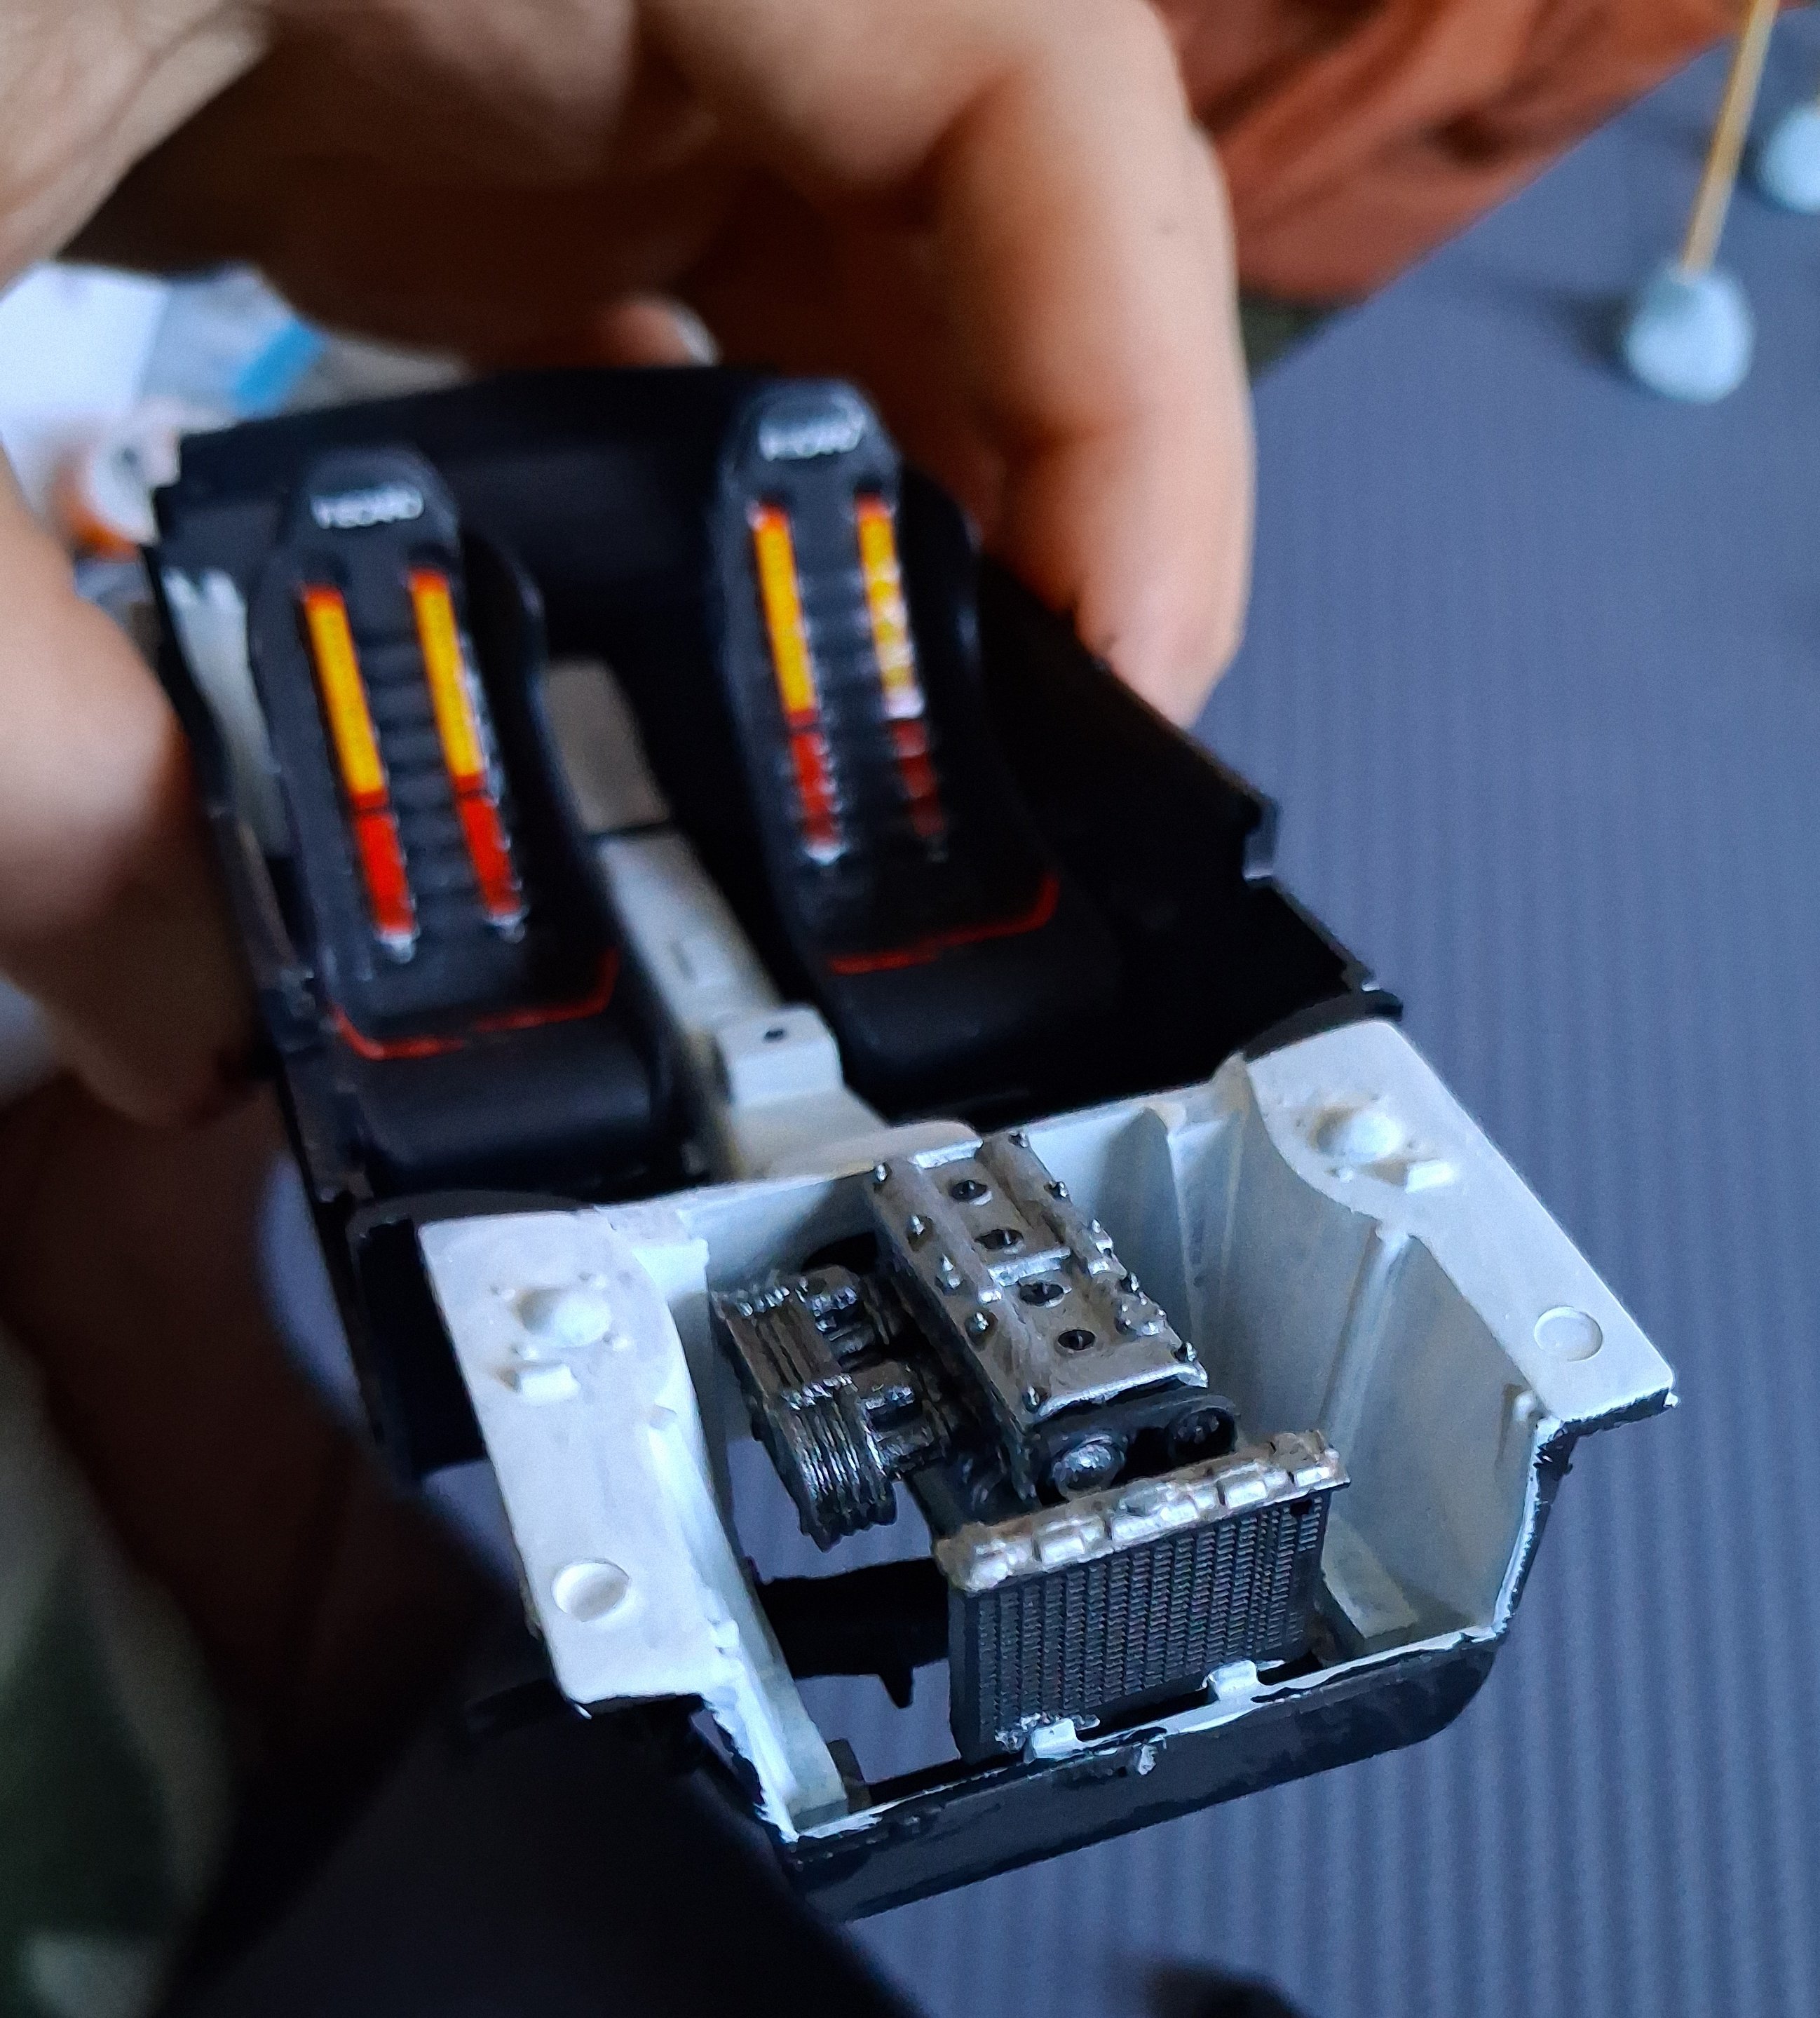
The vehicle's internals were fun to do. I used a toothpick to paint the chrome dashboard rings. Due to my lack of experience, I was unsure which parts would be visible in the final assembly. Therefore, in hindsight, I devoted a little too much attention to areas that are now invisible. I'm surprised how much detail the manual dedicates to hidden pieces - such as the fuel tank and battery in the boot!
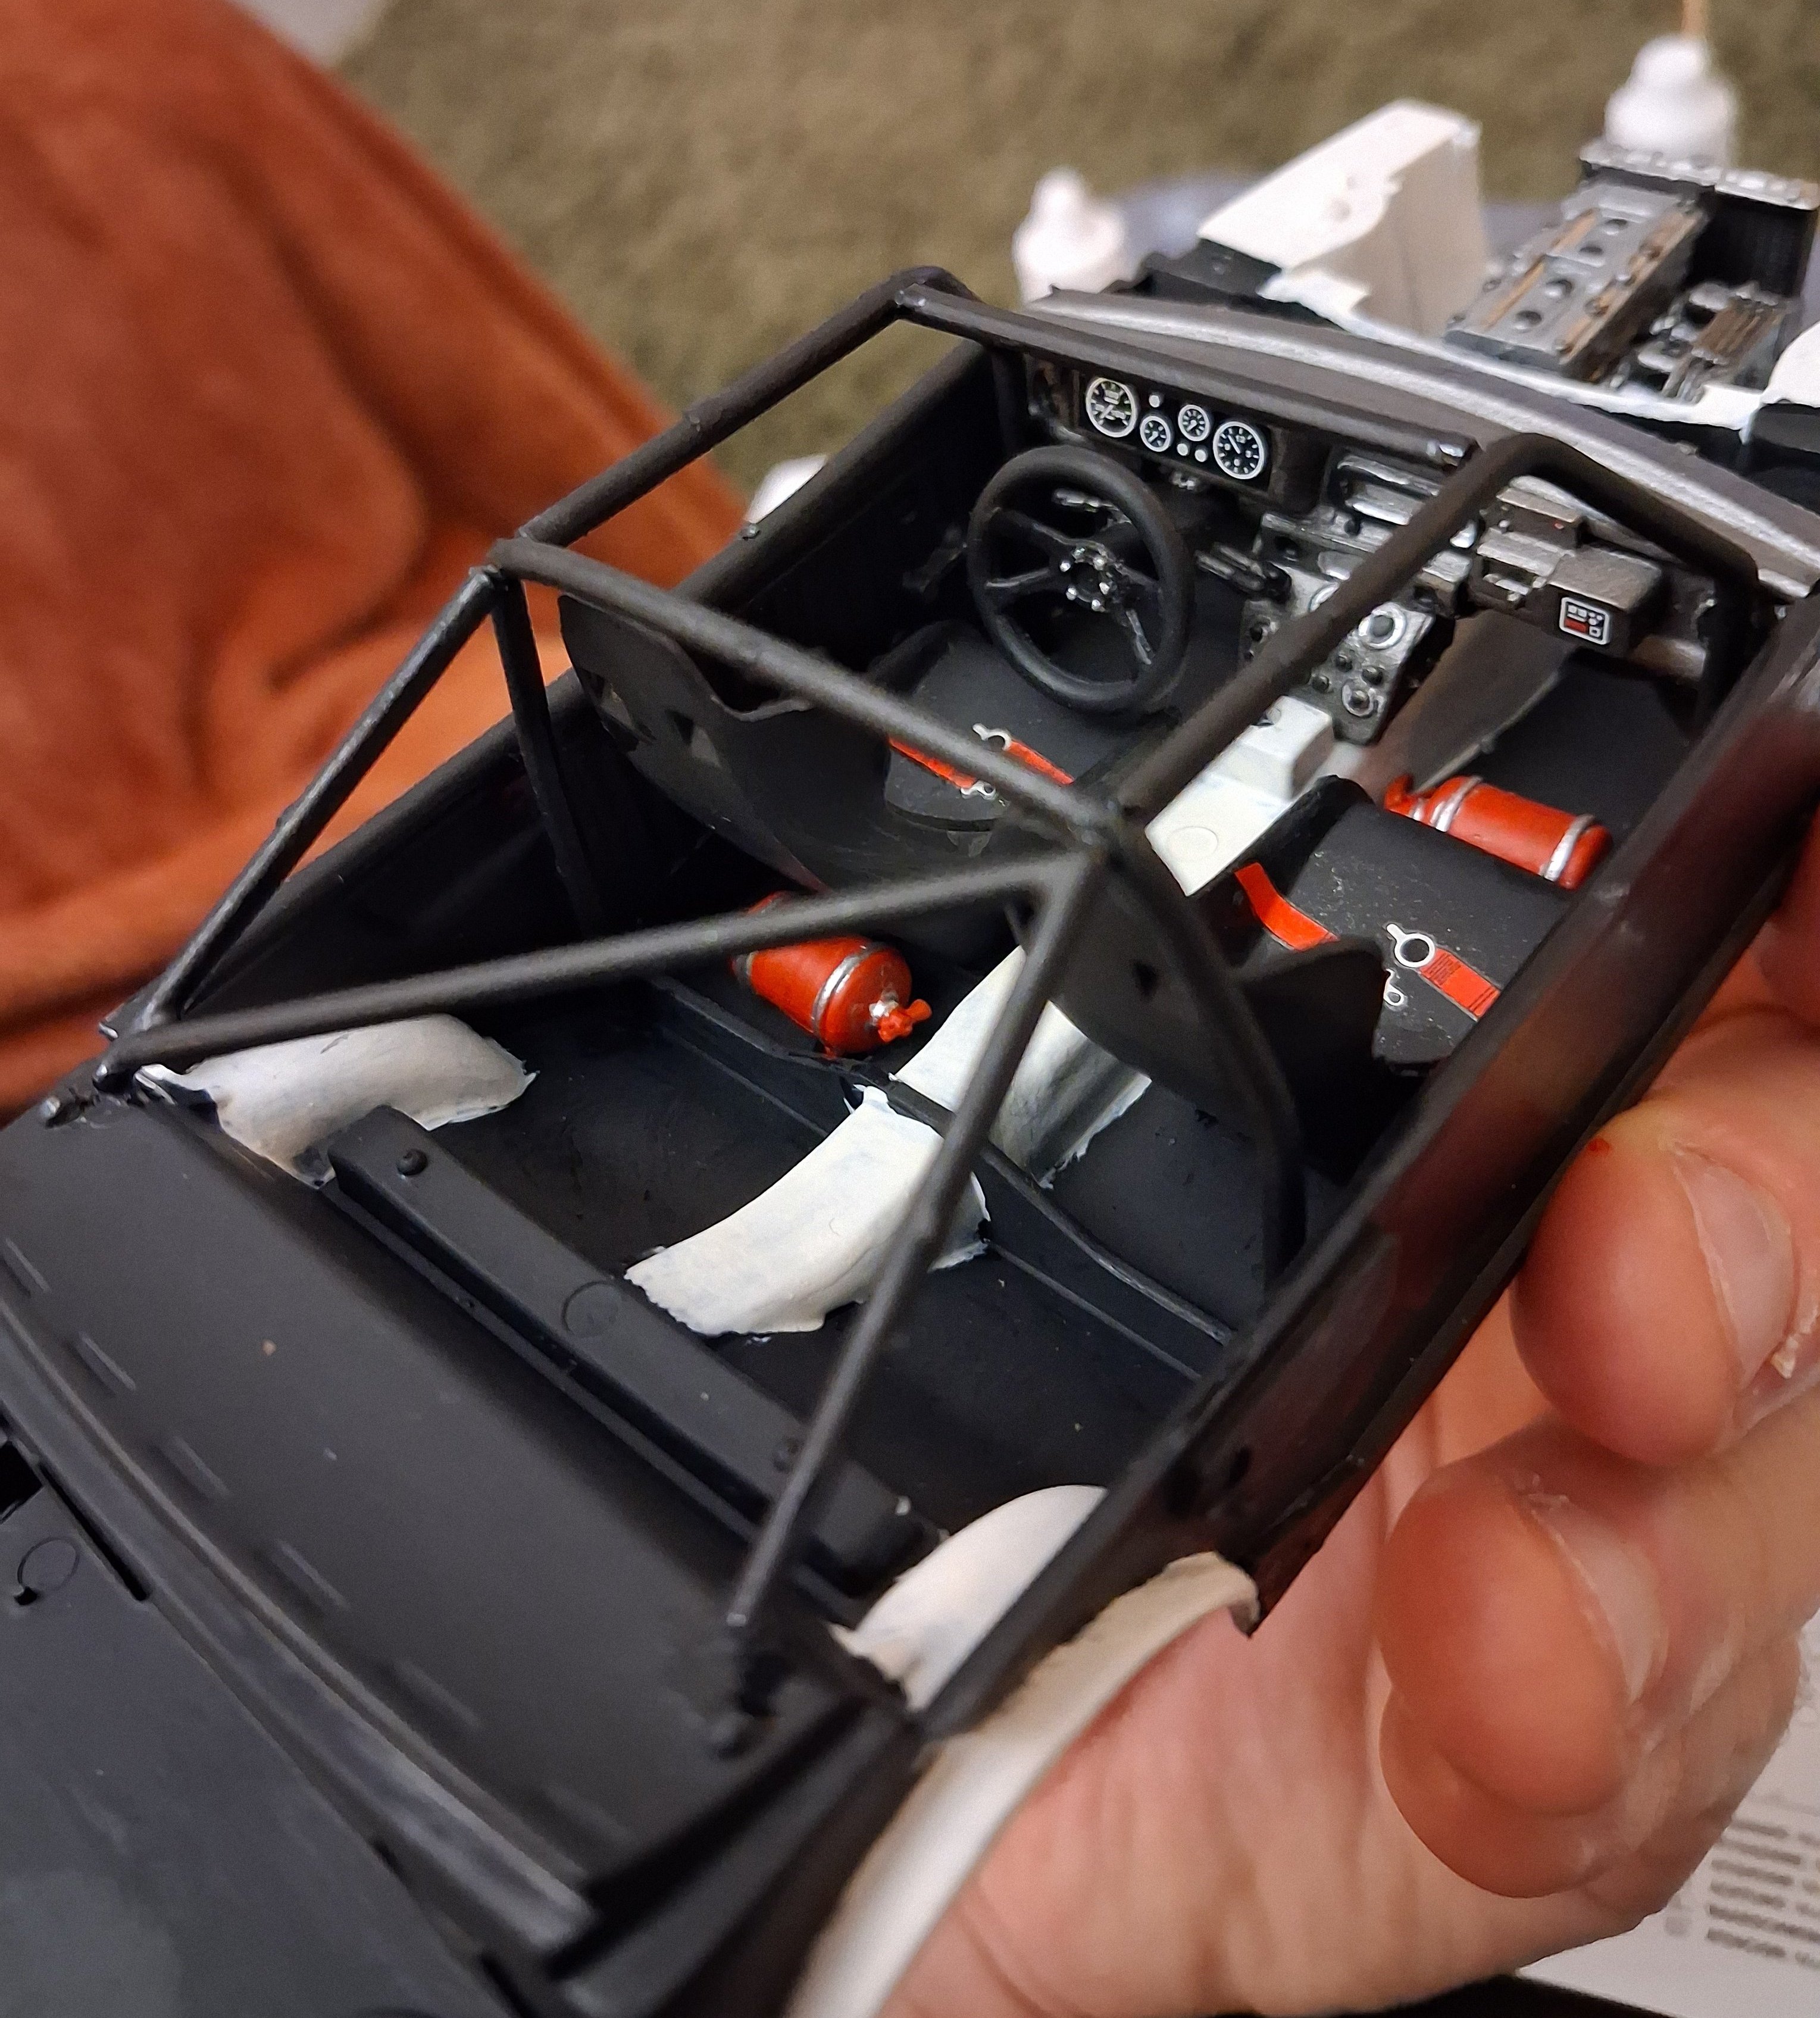
I disagreed with some colour choices in the user manual and so opted for my own instead. For example, I kept the transmission tunnel white and preferred silver brackets on the fire extinguishers, instead of black. The seatbelt decals suffered light silvering but I think that's because my water was slightly contaminated by metallic paint.
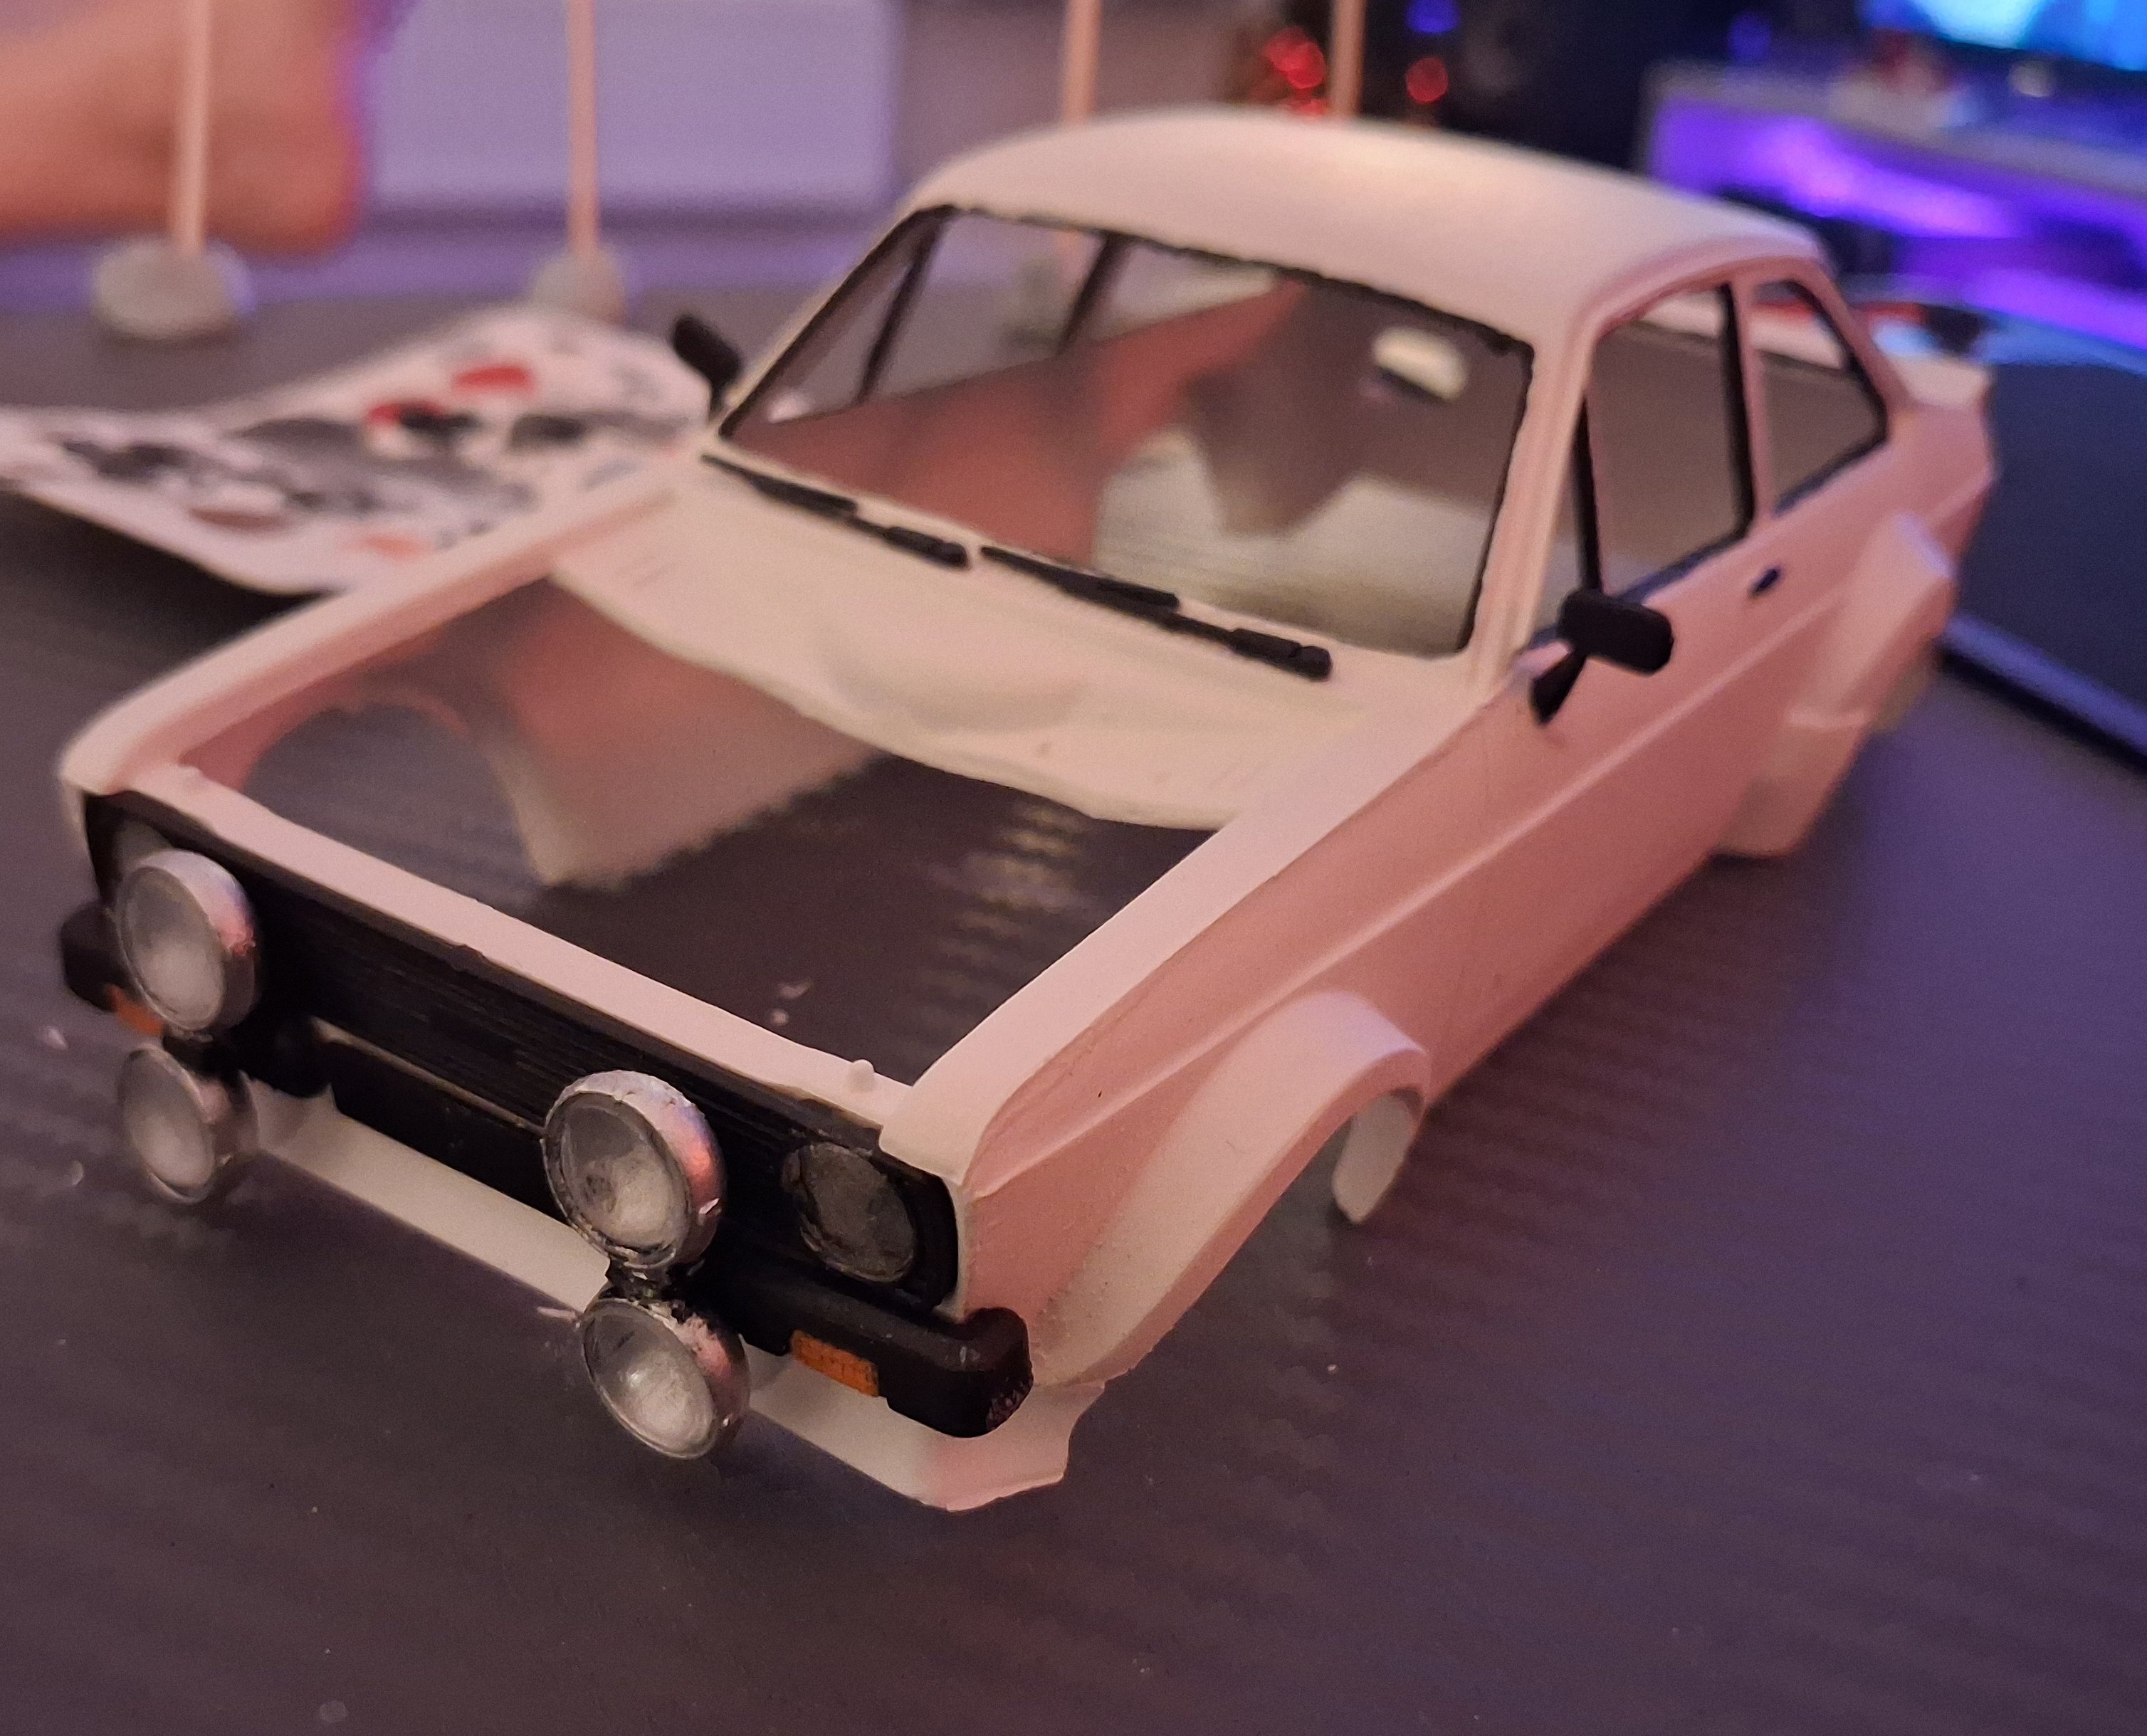
I then entered a lull in which the model appeared 80% finished for quite some time, yet on went the clipping, stirring, painting and drying of small parts. The body should've been coated in a gloss white but I only had matt. I contemplated adding a layer of gloss but had already begun to attach parts and things were going too smoothly to risk.
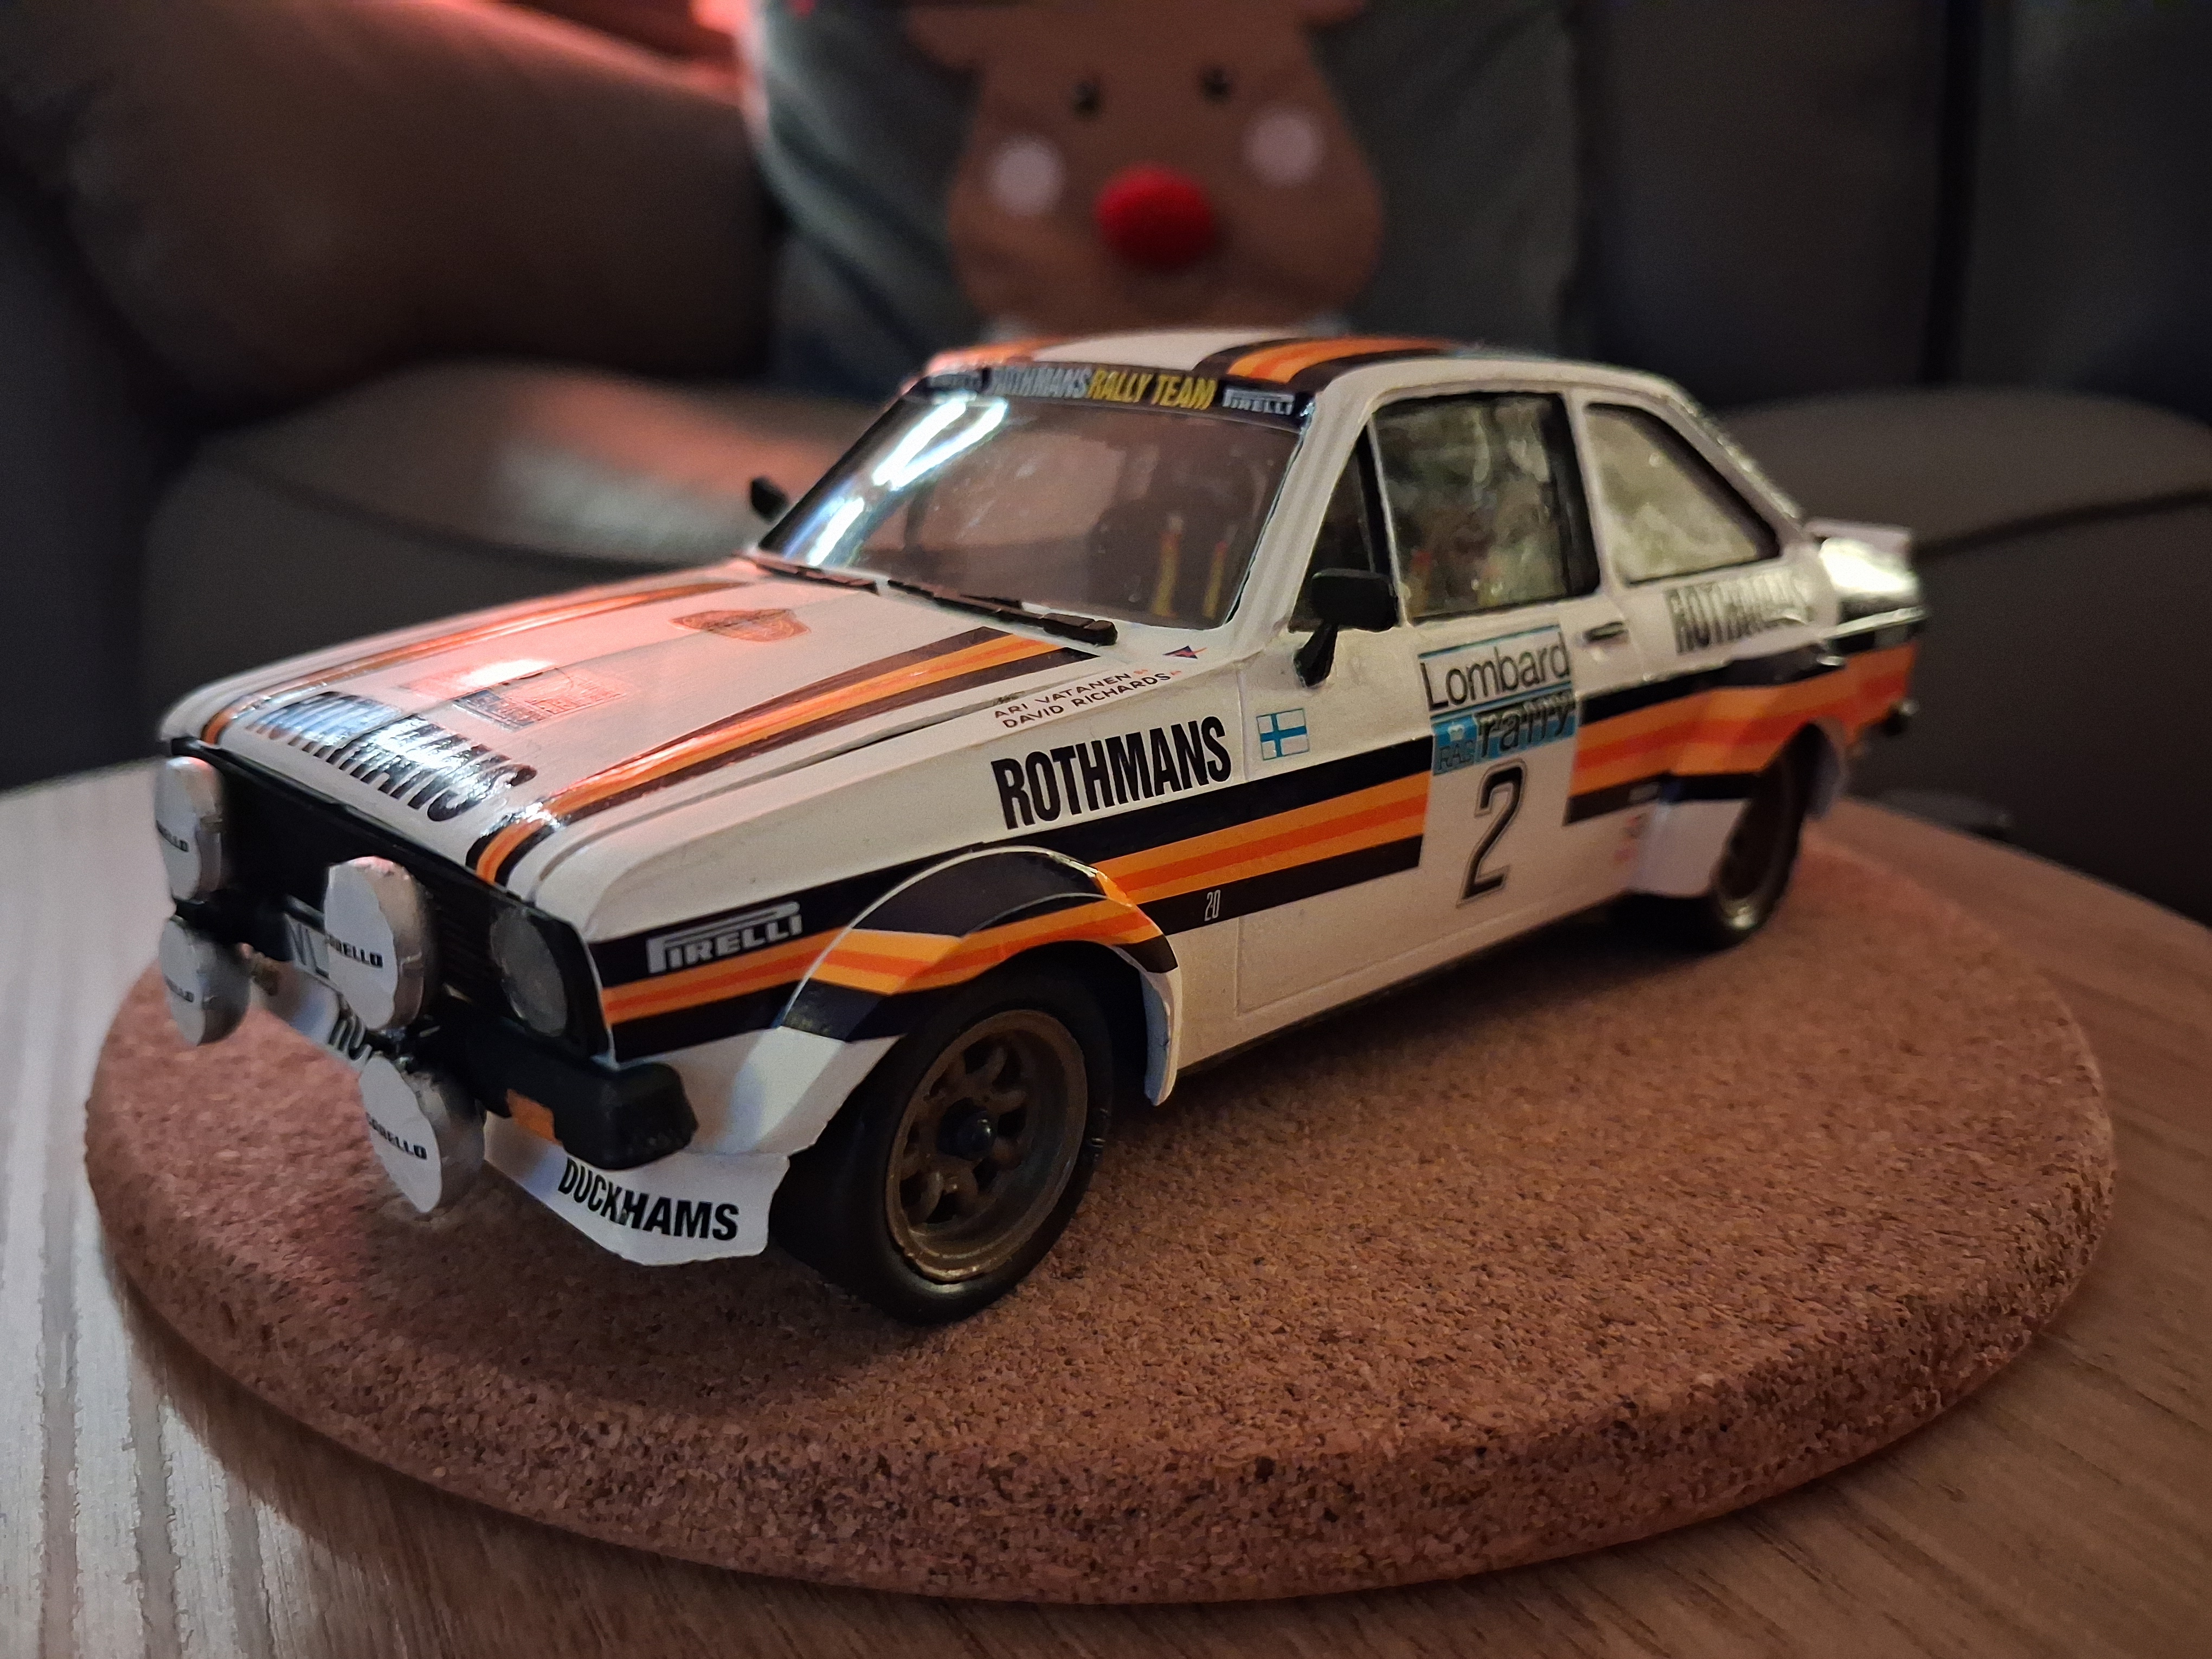
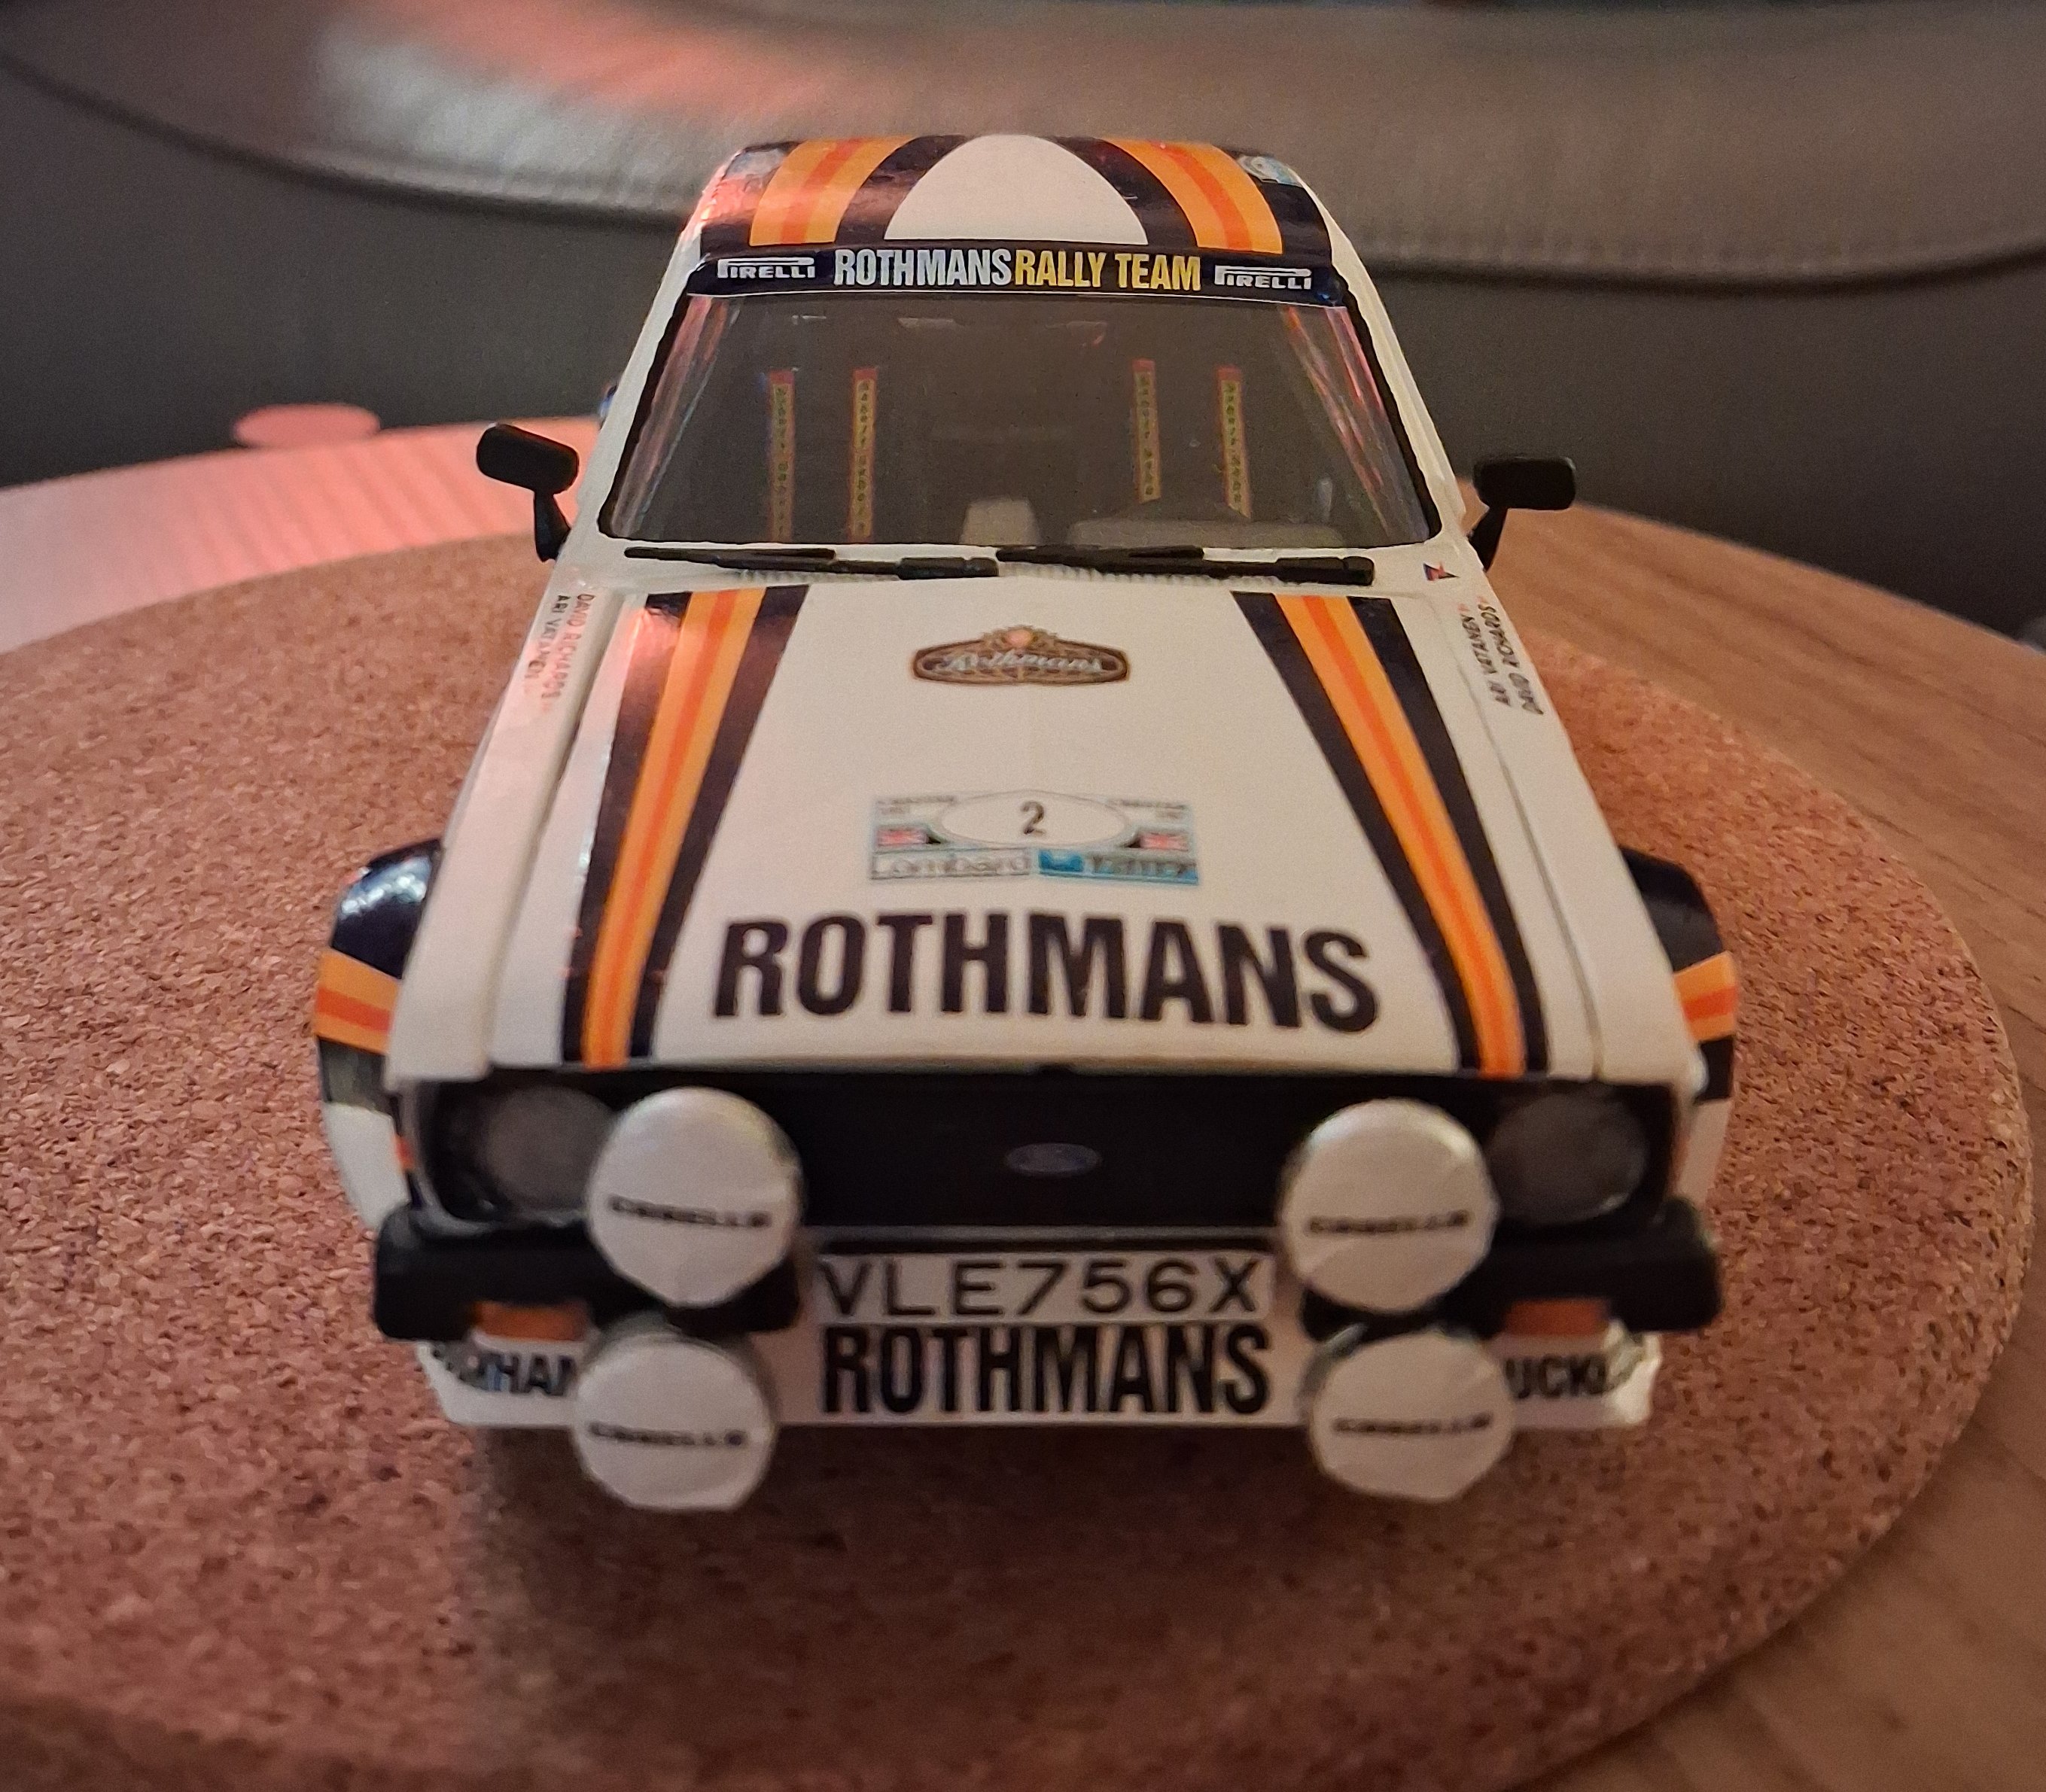

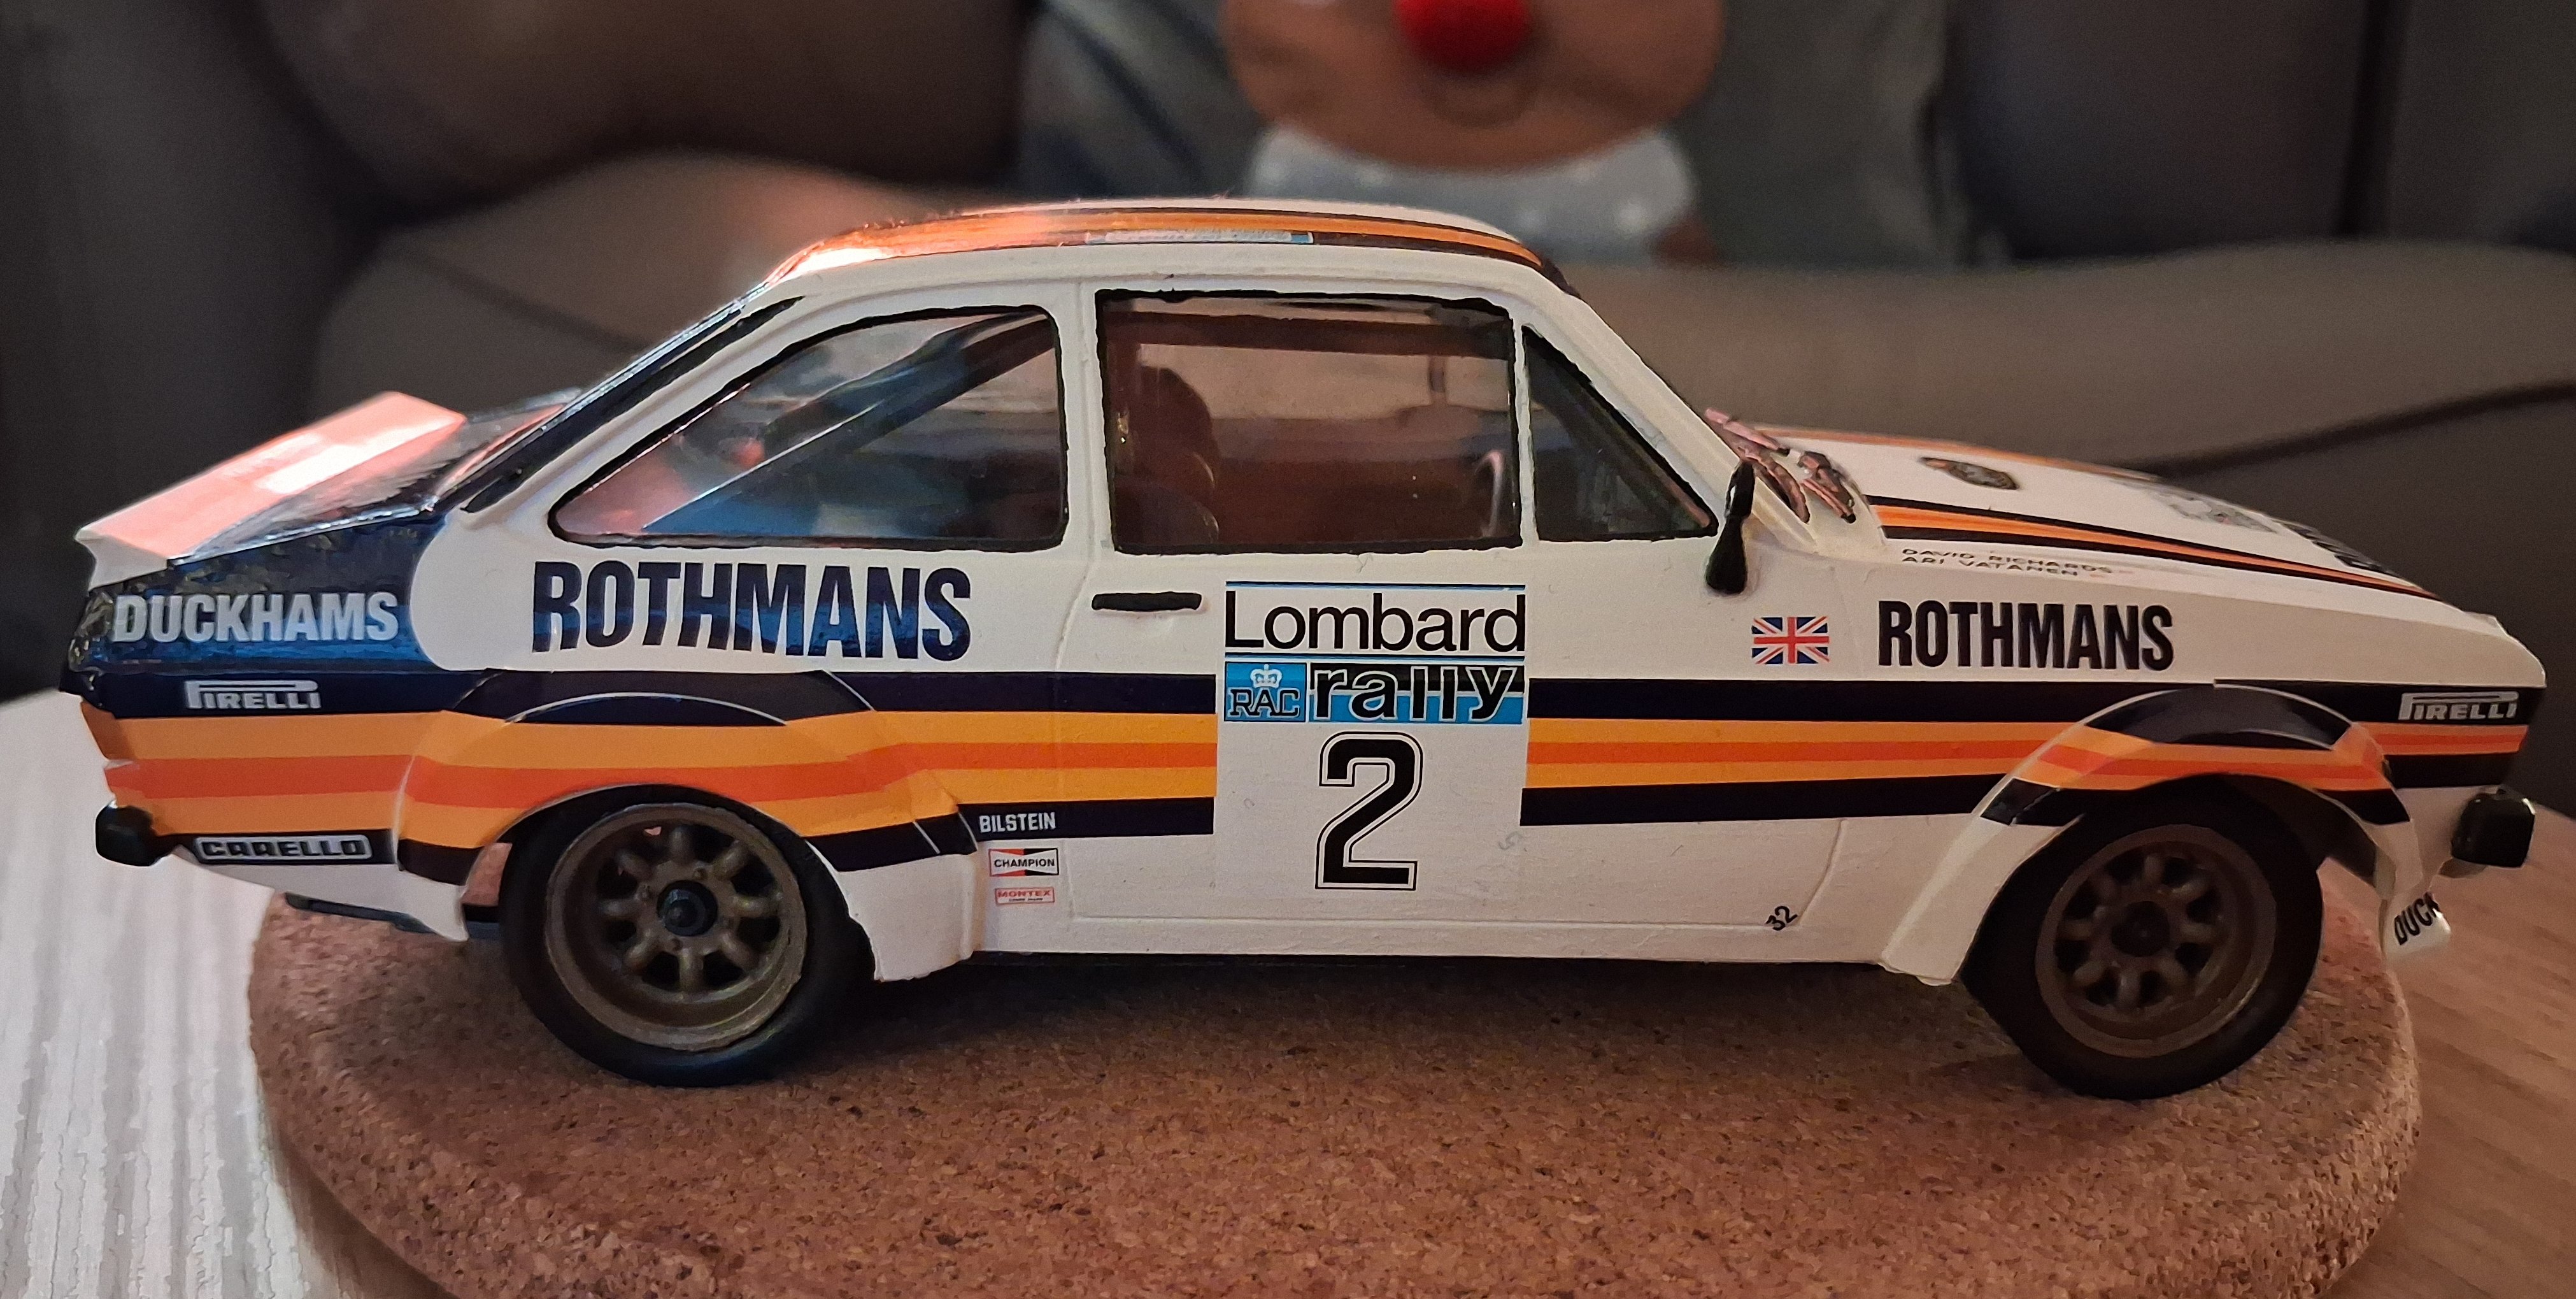
The decals took several hours to apply but really finished the model well. They appeared on the final page of the manual but I now realise they should've been applied before assembly; some had to be trimmed around existing features. The main stripe consisted of seven individual decals, which were really tricky but appeared better than expected.